After making the choice to switch ’58 to FSX I hadn’t really been pleased with it. I knew I would need to spend time with it making it work the way I wanted. A couple of things have happened recently to drastically improve my sim experience. Firstly I invested in some photo-scenery, from MegaScenery, and second was some excellent FSX tuning tutorials.
The choice of MegaScenery was easy, as I’ve been using their products in FS9 for years, with the additional incentive of a 50% sale 🙂 I bought Nevada state and Southern New South Wales, giving me Nowra and Nellis areas to fly around in glorious detail.
Tuning FSX was something I’d never done before, being a stuck in a rut FS9 guy. I followed the instructions from this post and the results were incredible, especially over photo-real scenery.
One of my biggest dis-likes of my FSX setup in ’58 was the way the visual ‘geometry’ looked. It looked as if it wasn’t staying the same ‘shape’ when you rolled or pitched the aircraft, significantly impacting the experience.
After some experimenting I split the display into 2 parts, one for the visual+HUD, the other for the main panel display. This approach corrected the visual geometry, and allowed for better options with the ‘out the window’ display.
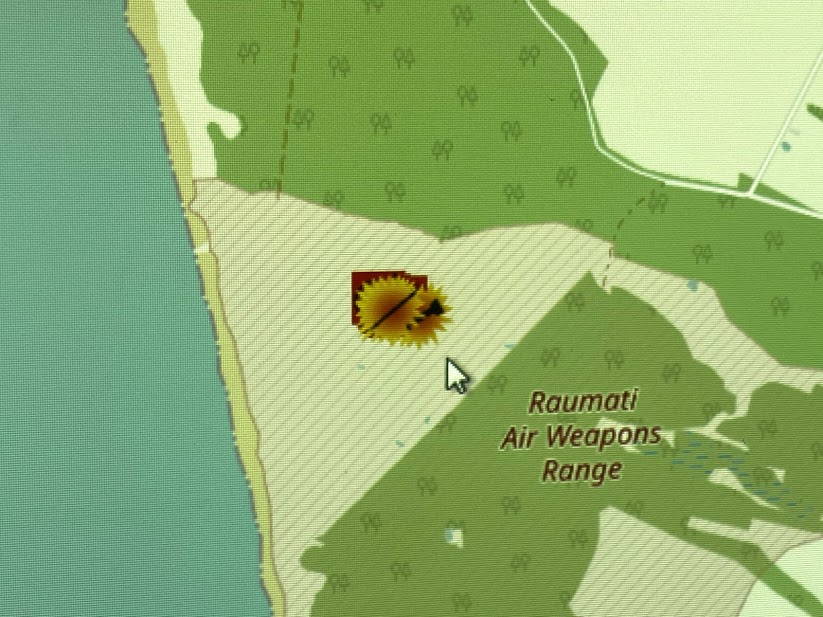
About this time, when I got the visuals looking good I stumbled on a program to create photo scenery complete with GIS derived autogenerated 3d objects. This meant that I could build my own scnenery for New Zealand, creating an amazingly realistic experience!

With this new-found gorgeous photo-scenery for NZ I naturally decided to move the Arrow to FSX as well! ‘In for a penny….’ as the saying goes 😉 A quick install of FSX, a little tuning and messing with GA28R software and the visual flying experience is awesome!
Now with the 2 sims up and running with FSX my attention moved to the ‘weaponizing’ of ’58. I had purchased VRS TacPack for this project, and it was now time to start implementing it in the sim. I had previously gotten it working, enough to be able to shoot, but that was the limit of it’s capabilities. The first step was learning the additional programs required to really create a combat environment. After much manual reading, tutorial video watching and file dissection I now have the basics of a working weapon system and target range.
Initial tests of the setup have been good, now development has moved on to refining the aircraft setup to better simulate the Kahu Skyhawk.
The plan is to implement guns, rockets, dumb bombs and sidewinders, with laser guided bombs and mavericks maybe in the future.
As of this week I am *finally* happy with the Skyhawk, so much so that I have invited Don and Baz back for a re-match 😉
Successful testing over the range was followed by an uneventful landing back at a very very dull Ohakea. This of course led me down another rabbit hole; converting my RNZAF AI work from FS9 to FSX format. My scenery, as flawed as it is, looks great, as do the converted aircraft. Screenshots to follow.
It’s been a long process, but I am really pleased with the way the sims are now working.