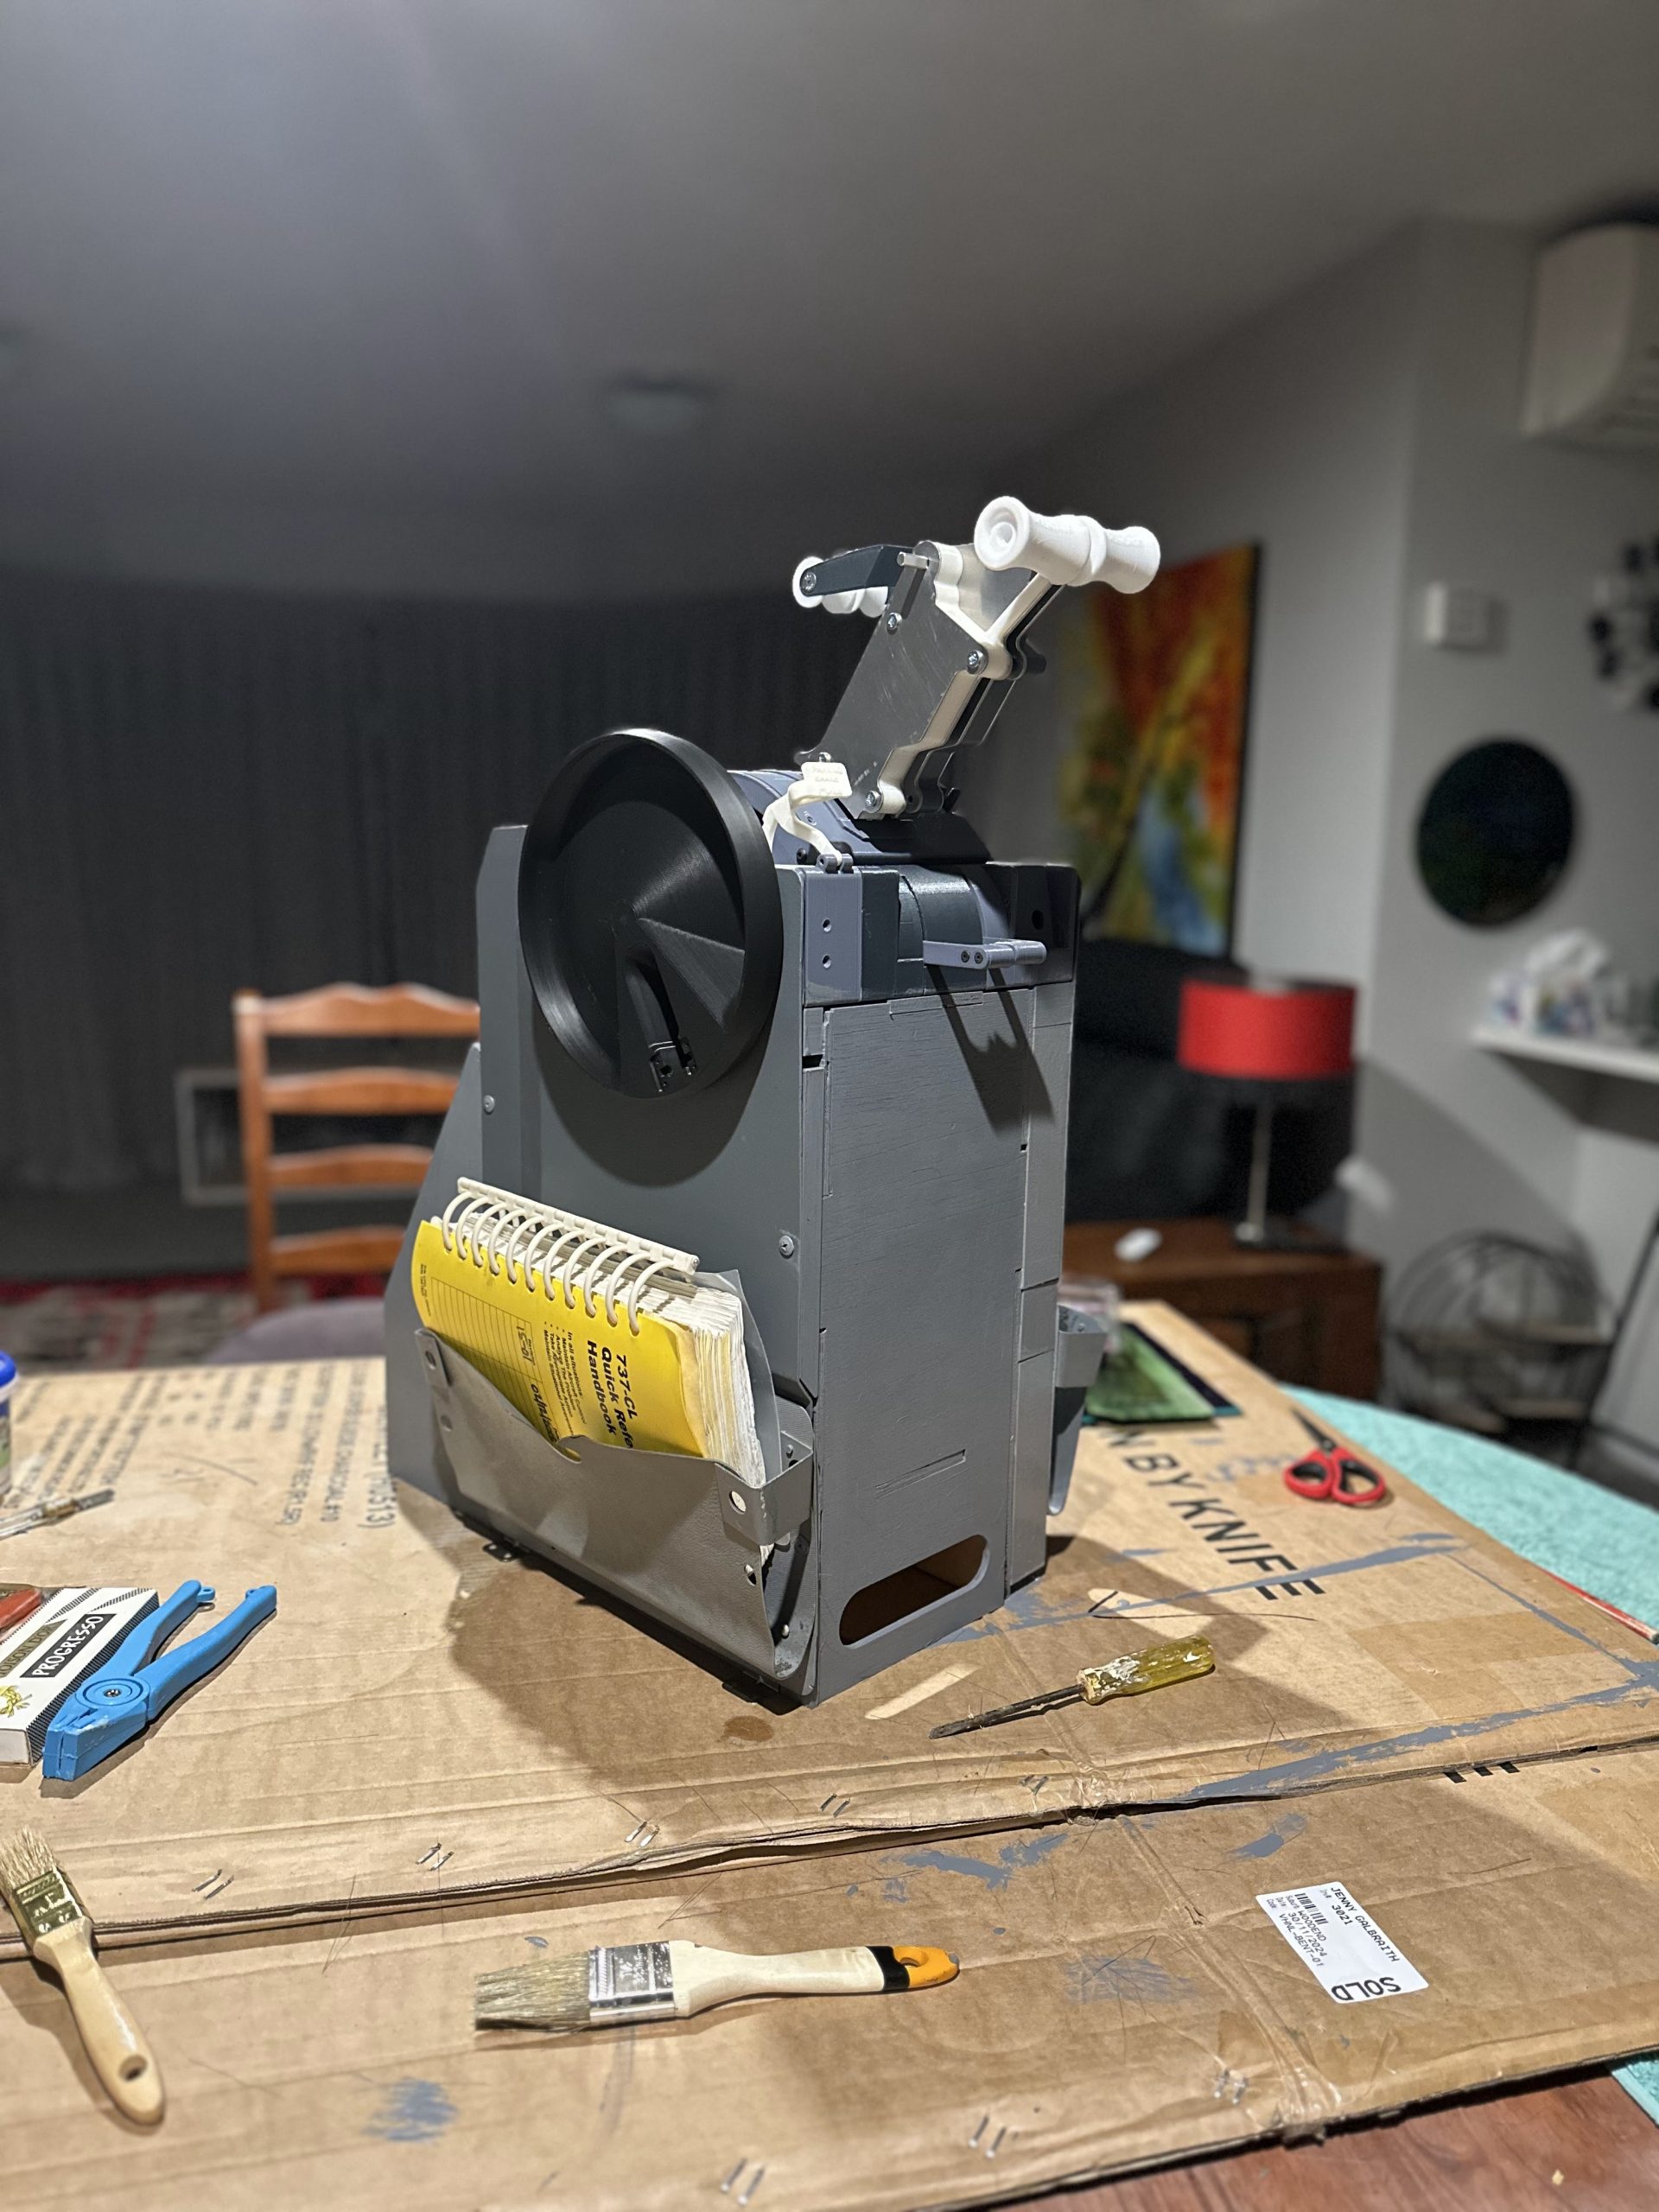
I bought a TQ design from 737DIYSIM some time ago, and have been slowly working away on it over the past couple of years (yes I build things on a glacial time scale).
I’ve modified a few parts, switching to water-jet cut aluminium for some of the bits which I felt would benefit from some more structure.
Once the unit was together I designed and laser cut a plywood base for it which matched the 3D printed top to the OEM 737 side covers and QRH holders I had. The 3D printed unit is not dimensionally correct so some considerations were made to make it fit, but still look good.
I added trim wheels (static for now) to a custom designed brackret mounted to the 3D printed structure.

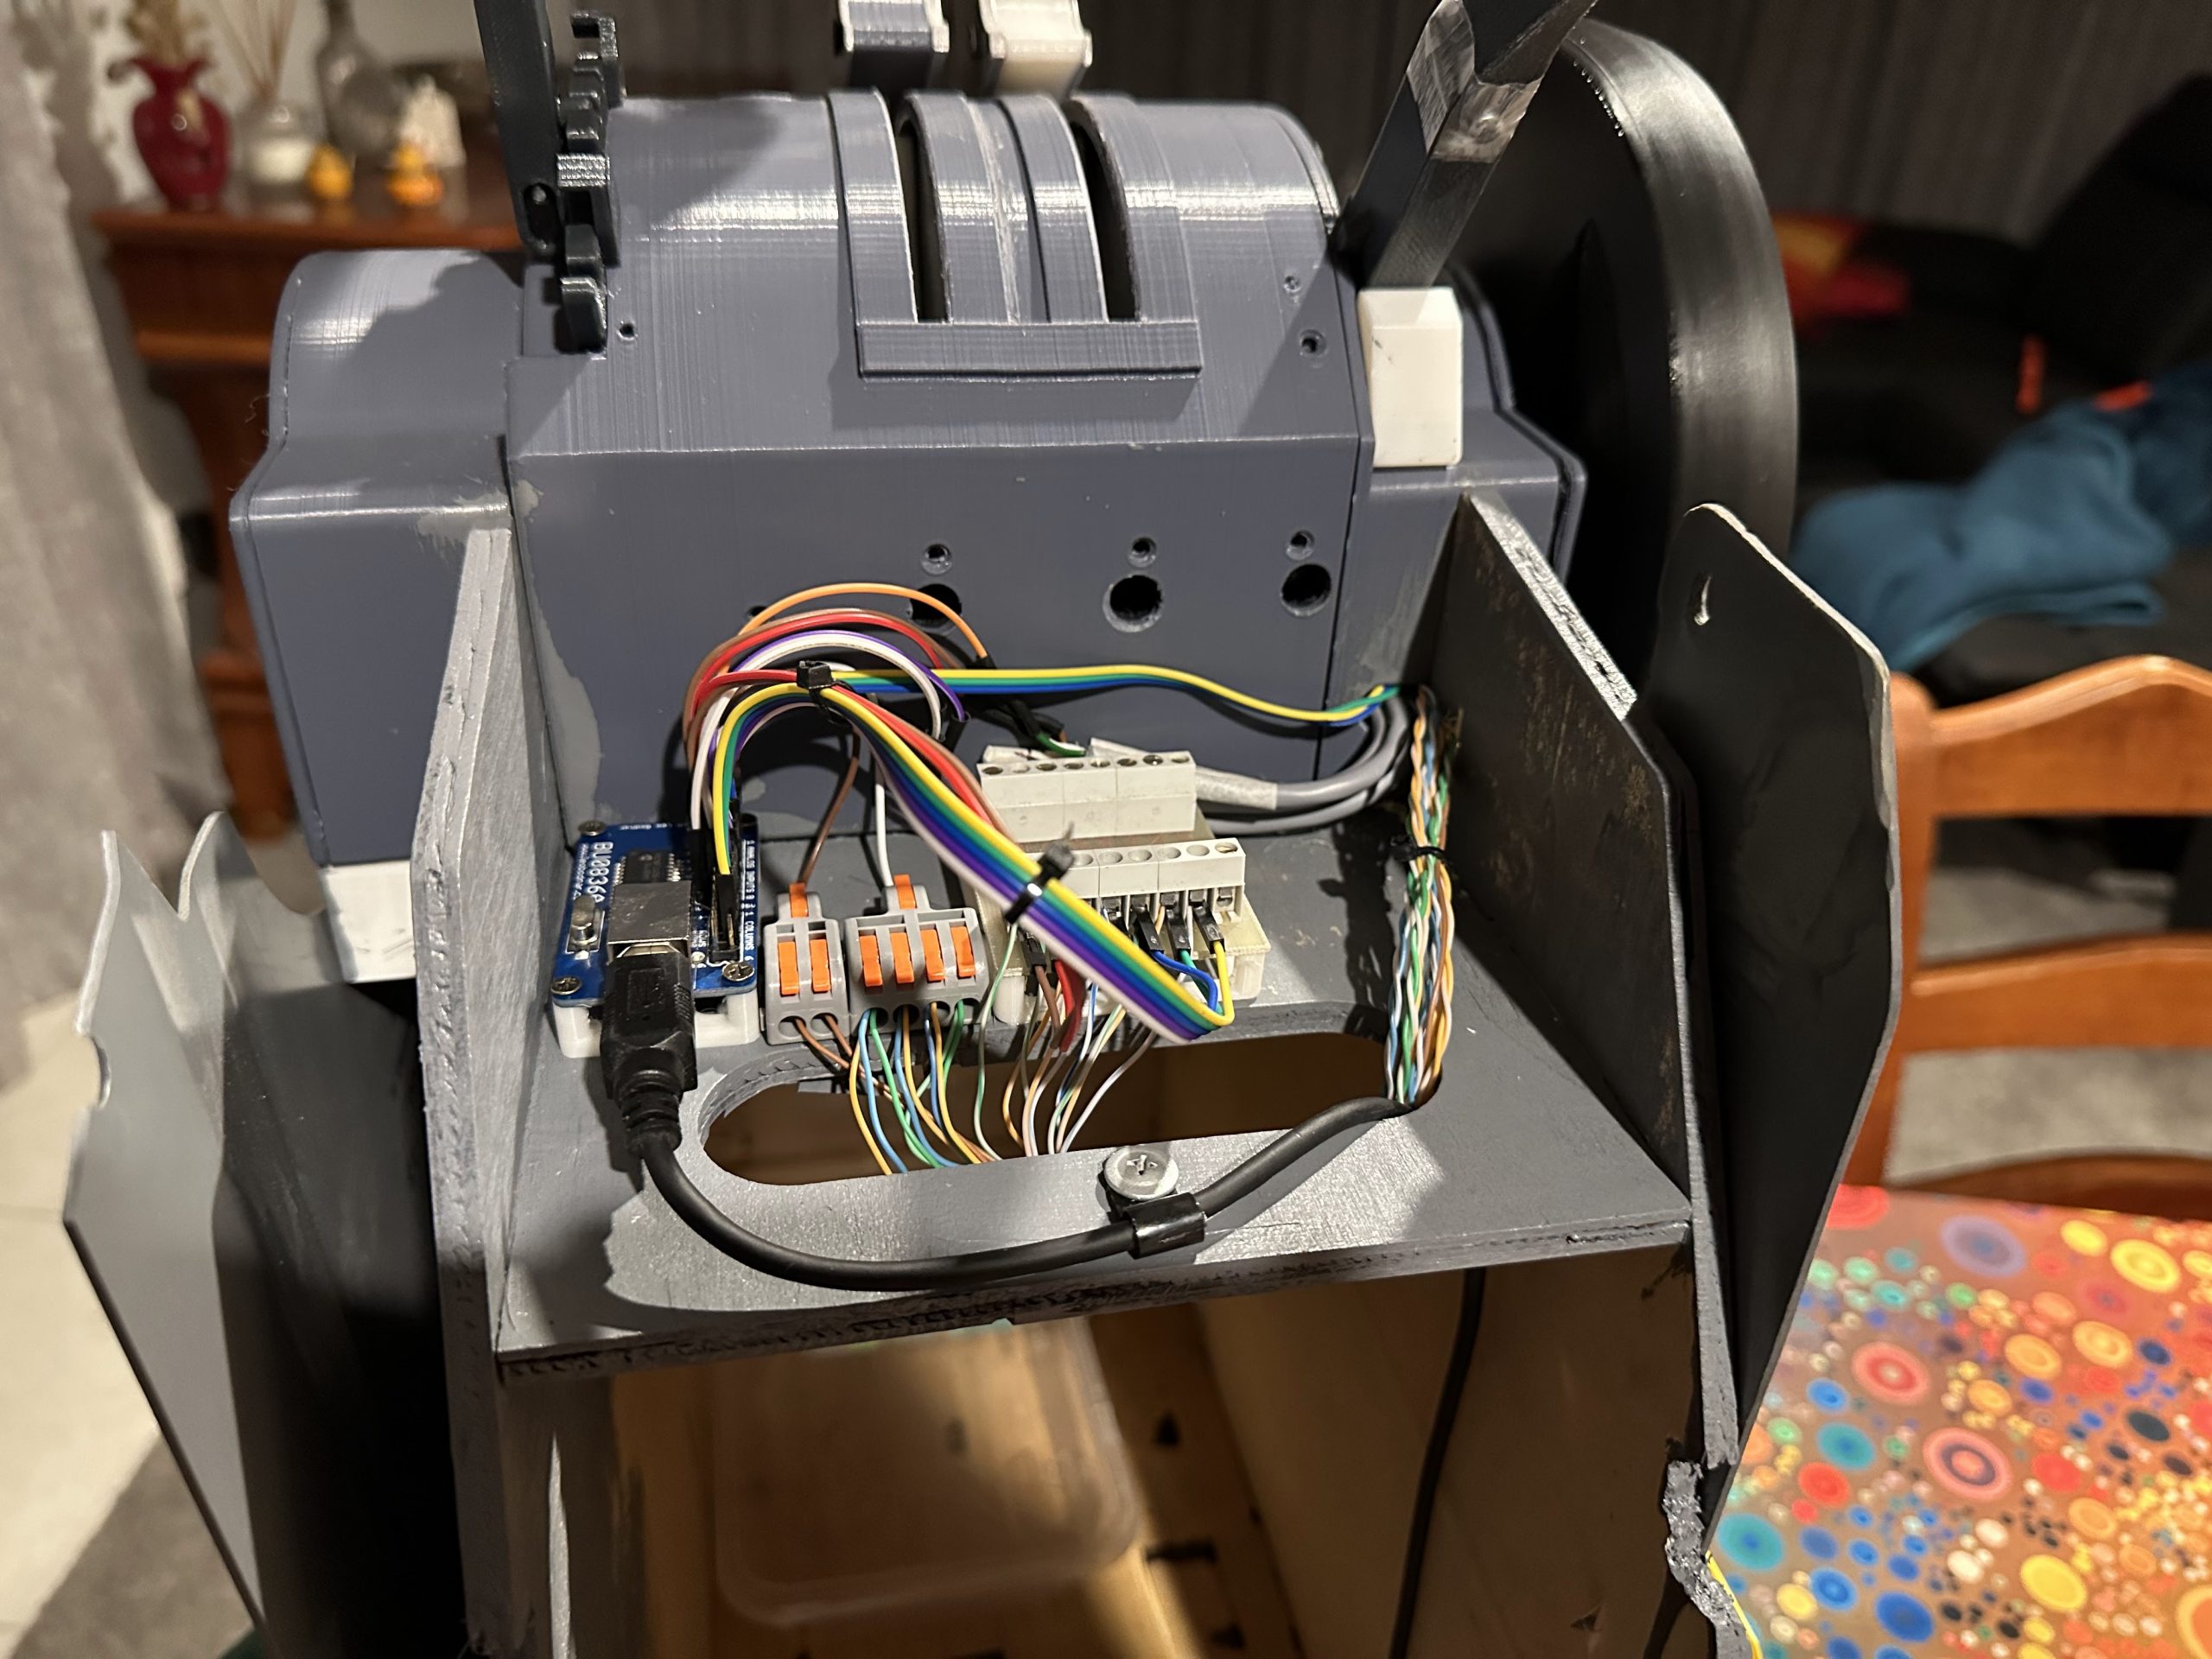
Wiring was pretty simple, with great clear instructions from 737DIYSIM!
I used Wago connectors for distribution of ground and +5V to the various potentiometers and switches. Wago’s are great quick-connect connectors which I only recently discovered.
The TQ is powered by a Leo Bodnar BU0836A input controller and is integrated in P3D via FSUIPC.